Team accounts
A Team lets you work together with your coworkers: invite them, share projects and spend credits from one shared balance.
Open Team in the main menu on the left (sidebar).
Note
We highly encourage you to use a Team if you work with other coworkers and manage multiple projects. Feel free to contact our support, so we can assist you in setting up a Team workflow.
How it works
There are two roles in a Team:
Admin – invites users and manages the Team balance. The Admin’s balance is the Team’s balance.
User – joins the Team by invitation and spends the Team’s credits.
Invite team members
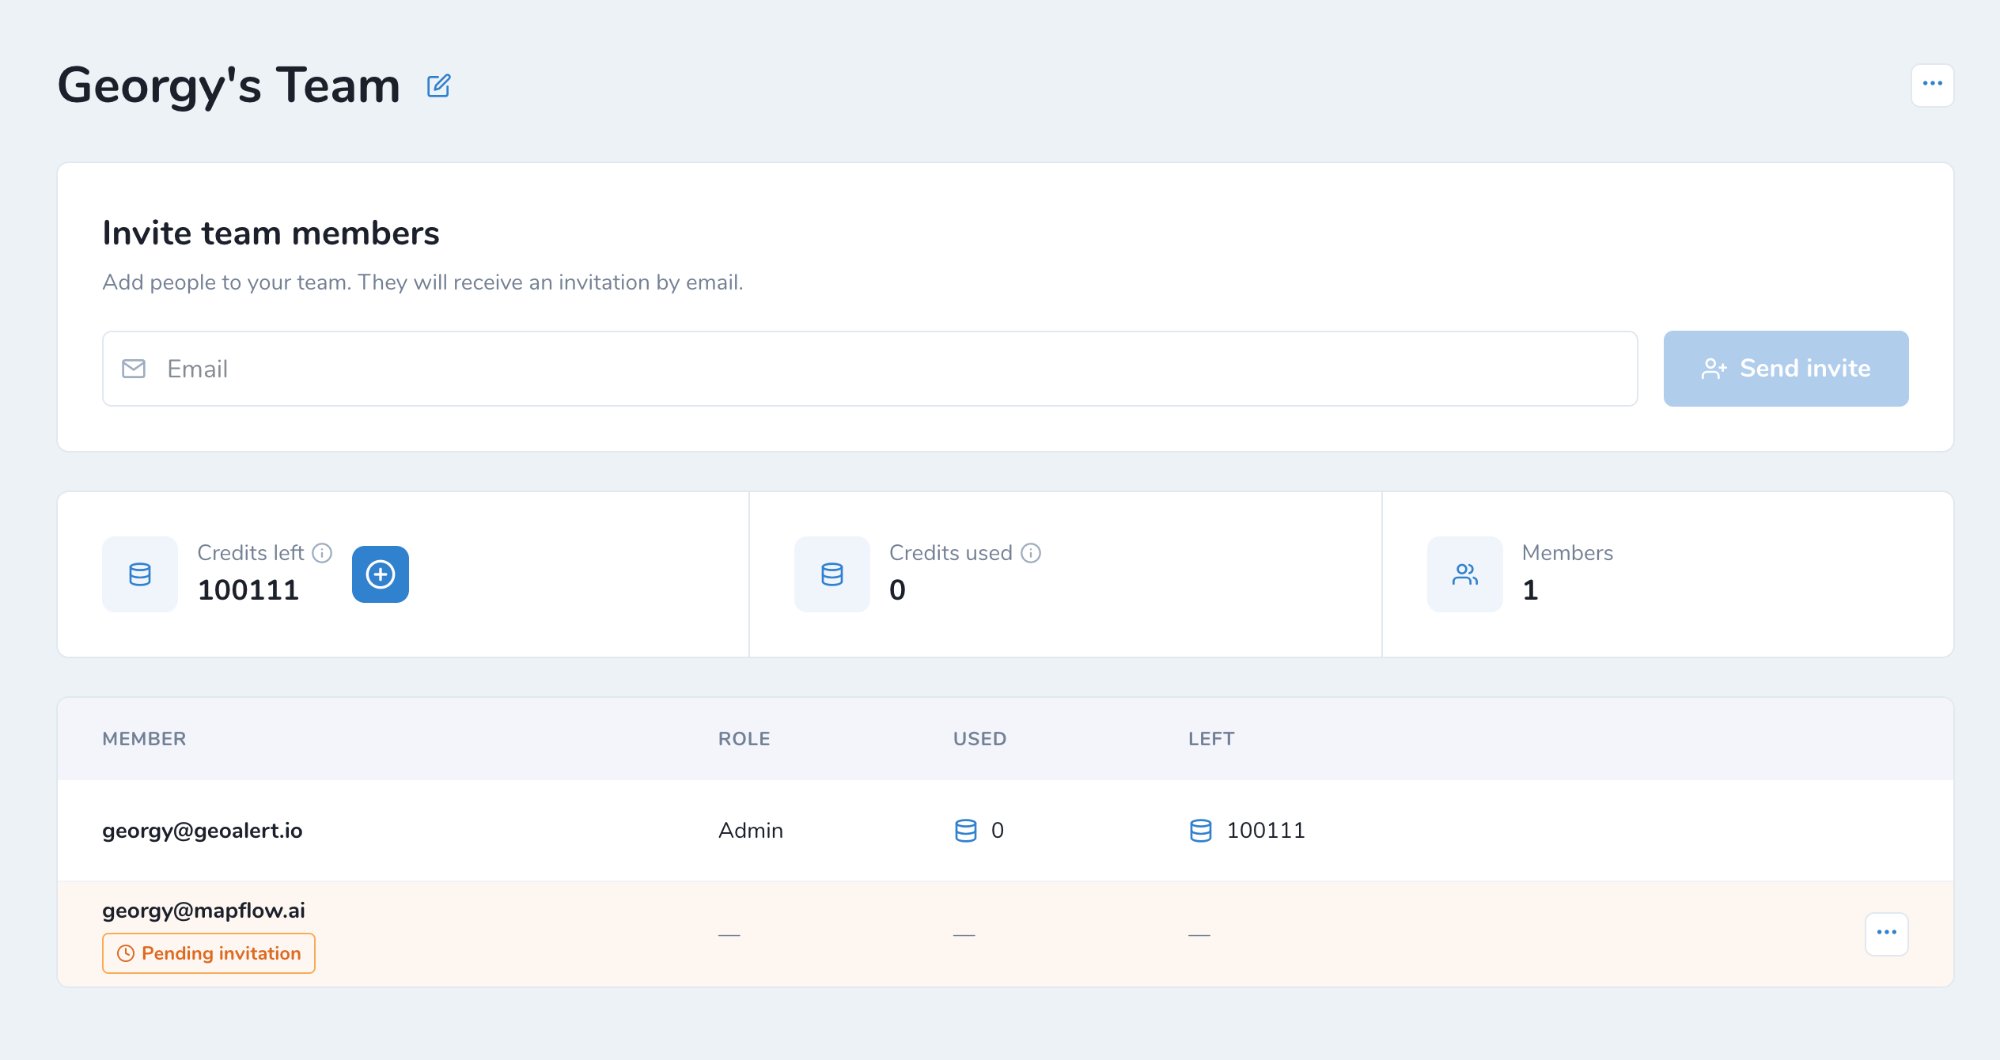
Enter the user’s email in Invite team members.
Click Send invite. The user receives the invitation by email.
Until the user accepts it, they are shown in the members list as Pending invitation.
Note
If the user is not registered at Mapflow yet, they can join the Team after signing up.
Join a Team
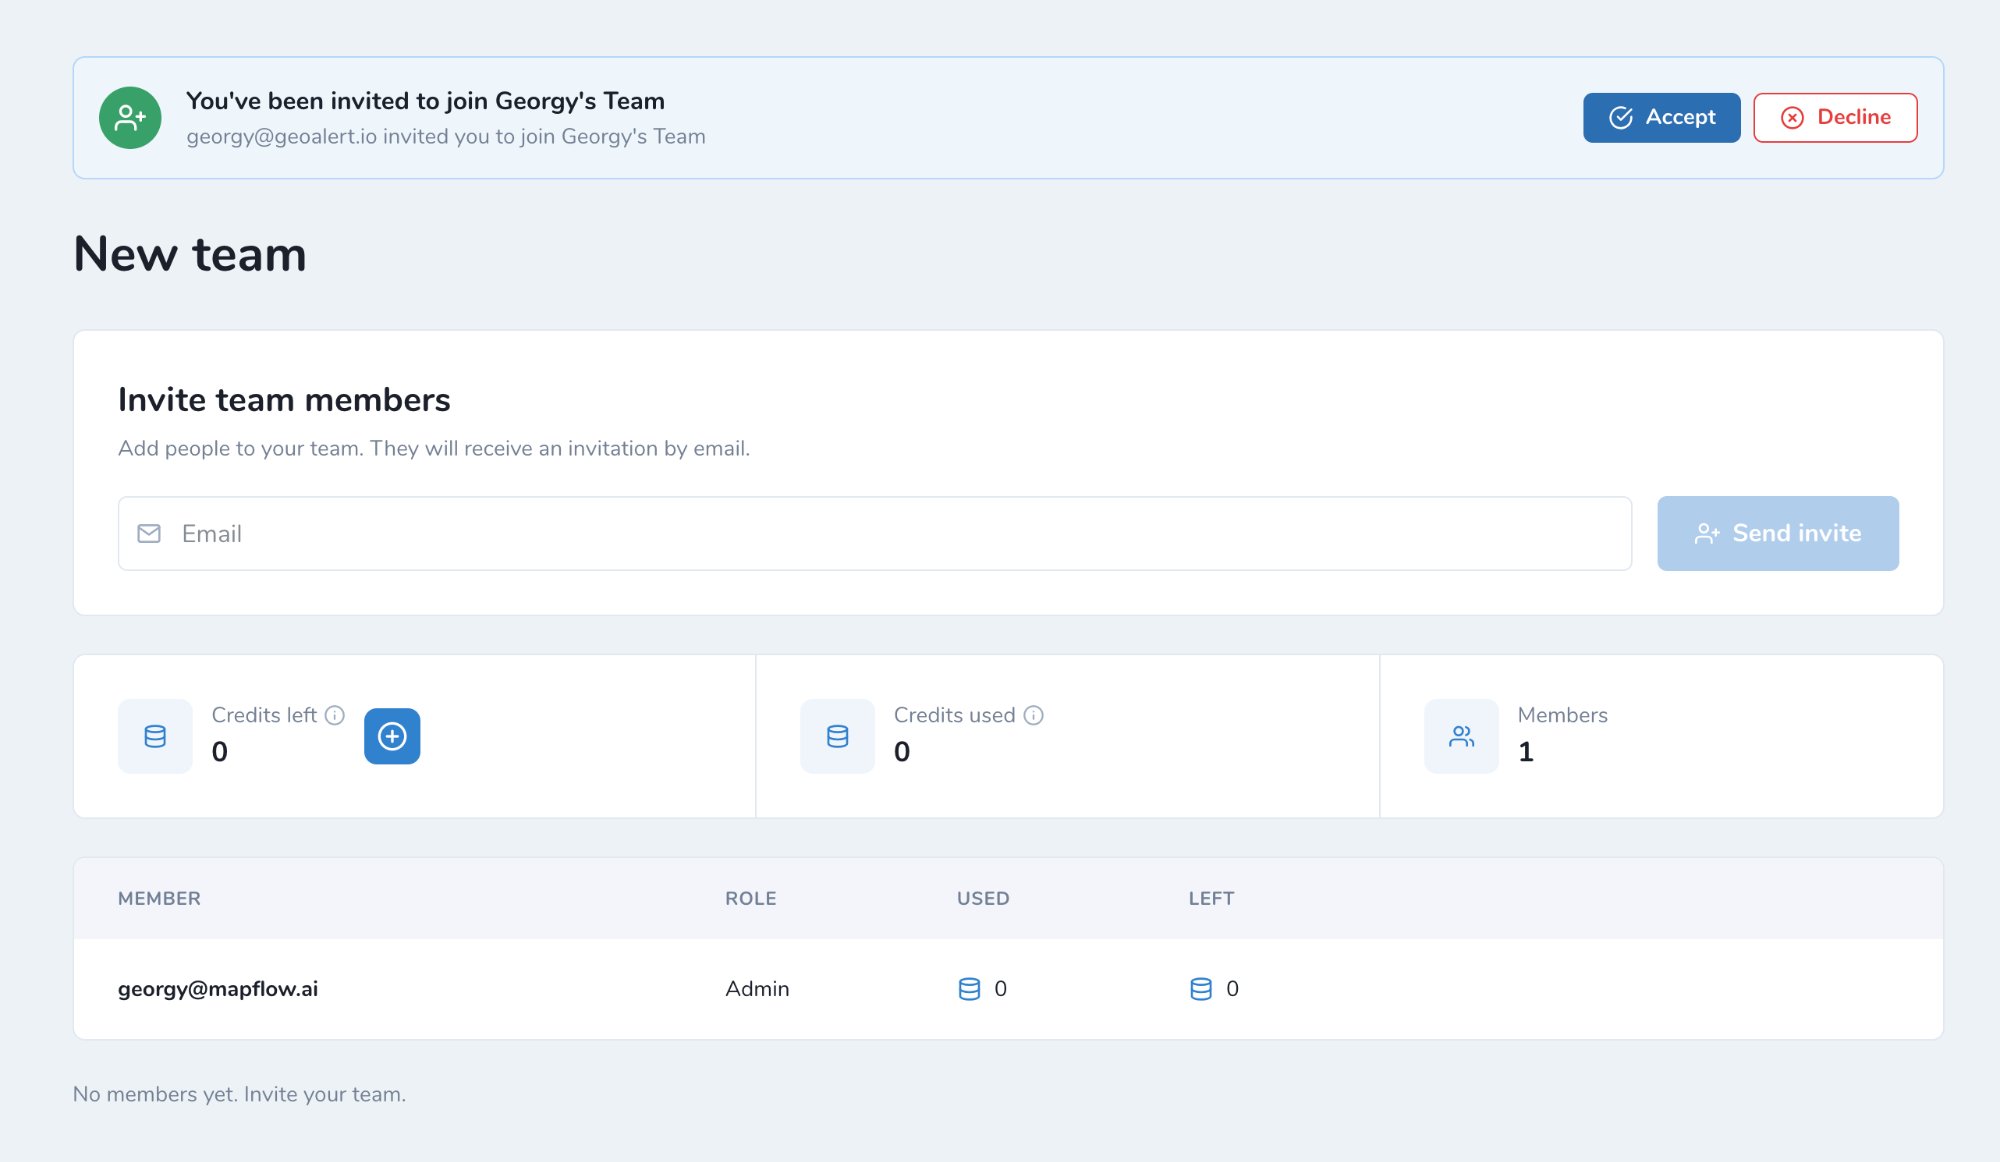
The invited user sees the invitation at the top of the Team page.
Click Accept to join the Team, or Decline to reject the invitation.
After joining the Team:
You spend the Team’s credits.
Your personal balance stays untouched.
You can’t create your own Team as long as you stay in this one.
Manage Team balance
The Admin manages the balance of the whole Team:
Add credits (+) – move credits from the Admin’s balance to a user.
Withdraw credits (-) – take credits back from a user to the Admin’s balance.
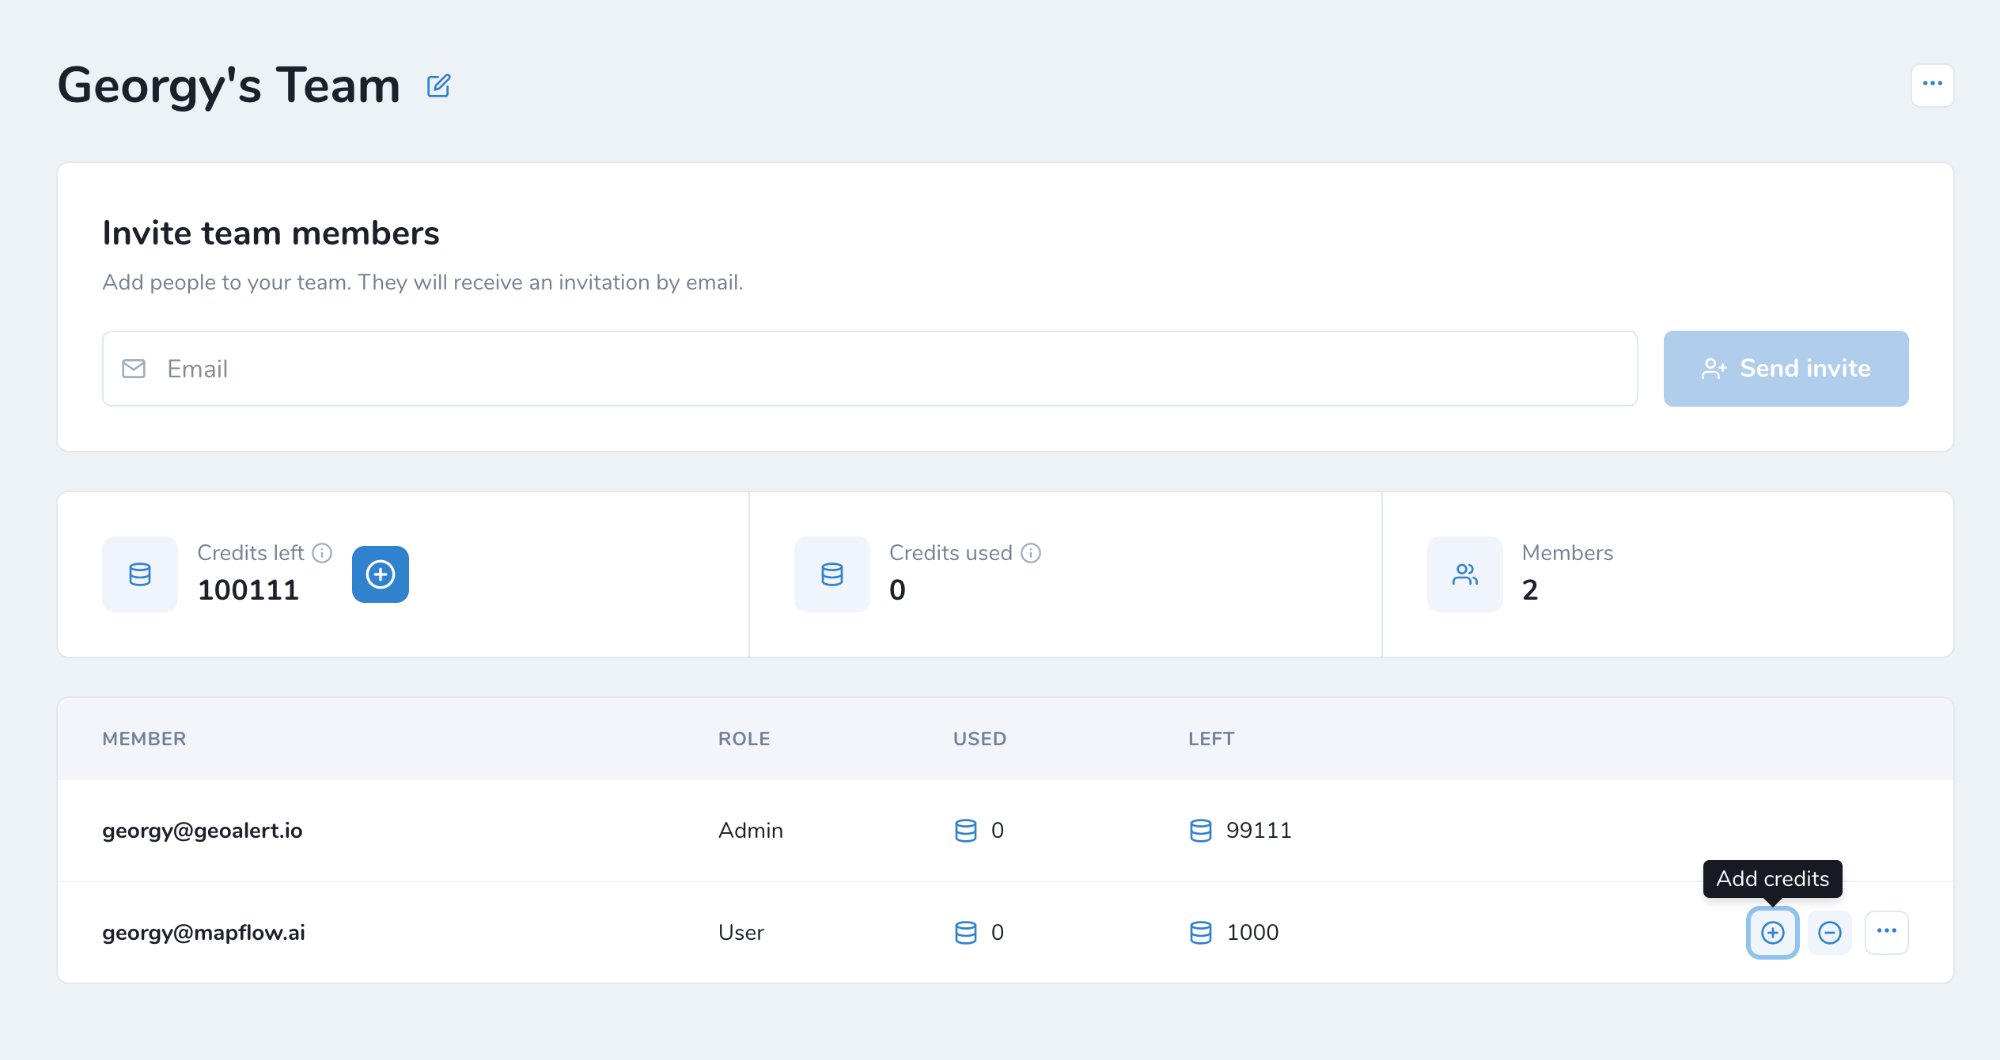
At the top of the page you can see:
Credits left – credits remaining in the Team. Click + to top up the Team balance.
Credits used – credits spent by the Team.
Members – number of Team members.
The members list shows each member’s role, credits Used and credits Left.
Both your Team balance and personal balance are displayed in the header.
Note
If your Team account is switched to area-based billing, the only difference is that the balance is managed in sq. km.
Project sharing in the Team
You can share your project with anyone in the Team and assign his role as needed. Go to the Projects. Click on a dot menu icon in a project card – Share.
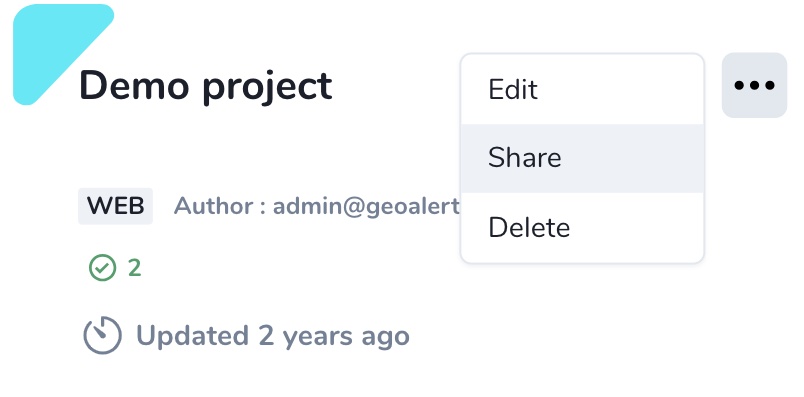
Select your coworkers or toggle “Anyone in the team” if you want to share with all of them.
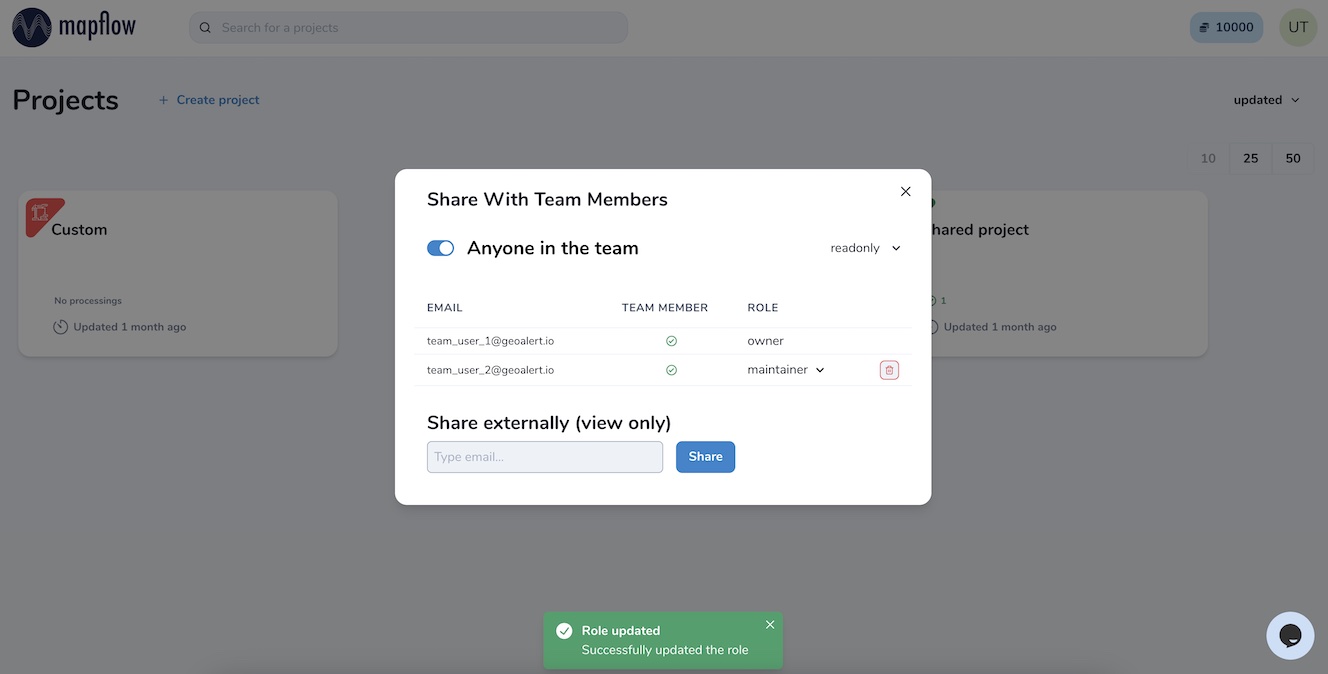
There are four types of the project user’s role that can be assigned to your coworkers:
readonly - can view the project history and the results
contributor – can run the workflows in the project
maintainer – can run and edit the workflows, and share projects with users (up to maintainer role)
owner – full rights to edit all roles in the project
Your collaborators will see the new shared projects in their dashboard and use them according to the role assigned.
Note
You can also share your project with any users outside your team for the view-only access. Go to the Project – Share and enter the existing Mapflow user’s email. If the new user is not registered at Mapflow.ai, invite him to register first.